



.jpg)
14 Easy Homemade Ice Cream Recipes to Keep You Cool This Summer

Summer heat makes you crave something cold, creamy, and genuinely satisfying — but store-bought ice cream rarely delivers the freshness or flavour you actually want.
Making your own ice cream at home solves this completely. With just a handful of ingredients and either an ice cream maker or nothing more than a freezer and a whisk, you can produce frozen treats that taste richer, fresher, and more genuinely delicious than anything from a supermarket tub.
This list gives you 14 of the best homemade ice cream recipes — ranked from the most essential classics to the most exciting, crowd-pleasing flavours — covering everything from churned custard-base ice creams to easy no-churn versions that require zero special equipment. Every recipe includes exact prep time, freeze time, servings, full ingredients, equipment needed, step-by-step instructions, expert tips, storage advice, and creative variations to make each one your own.
Whether you're cooling off on a hot afternoon, hosting a summer barbecue, or just want a genuinely impressive homemade treat to bring to a family gathering, this guide has the recipe for you.
Let's get scooping 👇

💛 Love what we create? Help us keep going: Donate to That Love Podcast
If you love this, check out: 10 Easy Plants That Thrive in Summer Heat
14. Banana Ice Cream 🍌

Prep Time: 10 minutes | Freeze Time: 4–6 hours Servings: 4 | Equipment: Food processor or high-powered blender
The simplest, healthiest, and most forgiving entry on this list — banana ice cream requires no cream, no eggs, no ice cream maker, and barely any skill, while still delivering a genuinely satisfying creamy texture.
Ingredients:
4 ripe bananas, peeled and sliced
2 tbsp honey or maple syrup
1 tsp vanilla extract
Pinch of salt
Optional: 2 tbsp peanut butter or cocoa powder for variation
Instructions:
Slice the bananas and freeze on a parchment-lined tray for at least 4 hours, until completely solid.
Add frozen banana slices to a food processor along with honey, vanilla, and salt.
Blend, scraping down the sides regularly, until the mixture transforms from crumbly to smooth and creamy — this takes 3–5 minutes of patient blending.
Serve immediately as soft-serve, or transfer to a container and freeze for 1–2 hours for a firmer scoop.
Expert Tips: Use bananas that are properly ripe (with brown spots) before freezing — they blend smoother and taste sweeter. Don't rush the blending process; the mixture goes through a crumbly stage before becoming creamy.
Storage: Keeps in an airtight container in the freezer for up to 2 weeks. Let sit at room temperature for 5–10 minutes before scooping if frozen solid.
Variations: Add 2 tbsp peanut butter for banana-peanut butter ice cream, or 2 tbsp cocoa powder for chocolate banana. Swirl in melted dark chocolate for a banana-choc-chip version.
Shop This Recipe:
🎙️ Stream That Love Podcast while you cook — original audio stories: thatlovepodcast.com/episodes
13. Coffee Ice Cream ☕

Prep Time: 20 minutes | Freeze Time: 4–6 hours (plus churning) Servings: 6 | Equipment: Ice cream maker, saucepan, mixing bowls
Rich, deeply aromatic, and genuinely sophisticated, coffee ice cream is the grown-up flavour that consistently outperforms its supermarket equivalent when made properly at home.
Ingredients:
2 cups heavy cream
1 cup whole milk
¾ cup granulated sugar
4 egg yolks
3 tbsp instant espresso powder
1 tsp vanilla extract
Pinch of salt
Instructions:
Heat the cream and milk in a saucepan over medium heat until just steaming, then whisk in the espresso powder until dissolved.
In a separate bowl, whisk the egg yolks and sugar until pale and slightly thickened.
Slowly pour the hot cream mixture into the egg yolks while whisking constantly, to temper the eggs without scrambling them.
Return the mixture to the saucepan and cook over low heat, stirring constantly, until it thickens enough to coat the back of a spoon (about 5–8 minutes).
Strain through a fine sieve into a bowl, stir in the vanilla and salt, and chill completely in the fridge (at least 4 hours, ideally overnight).
Churn in your ice cream maker according to manufacturer instructions, then transfer to a container and freeze for at least 4 hours before serving.
Expert Tips: Use real instant espresso powder, not regular instant coffee — the flavour is significantly more concentrated and authentic. Chilling the custard base thoroughly before churning produces a smoother final texture.
Storage: Keeps in an airtight container in the freezer for up to 3 weeks.
Variations: Add 1/3 cup chocolate-covered espresso beans for crunch, or swirl in caramel sauce for a coffee-caramel combination.
Shop This Recipe:
12. Cherry Vanilla Ice Cream 🍒
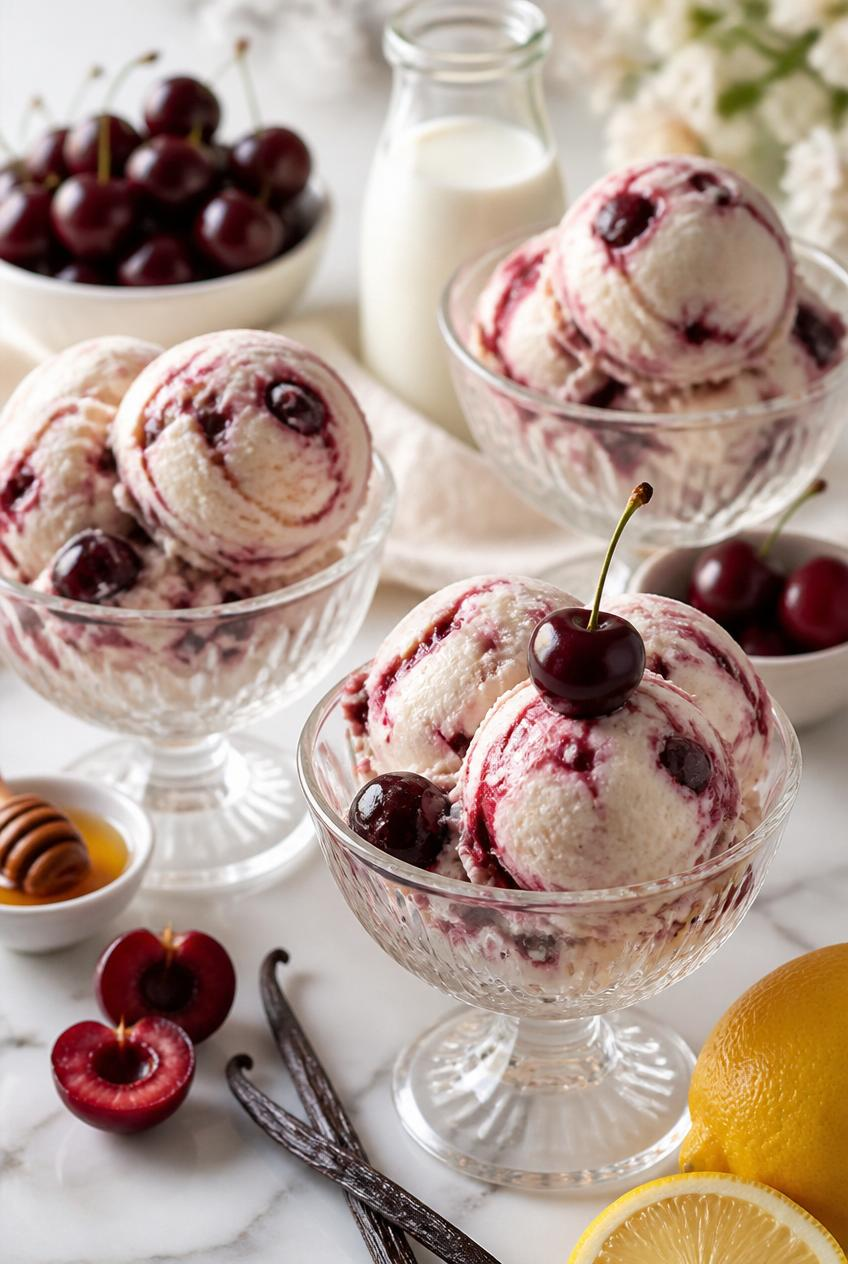
Prep Time: 25 minutes | Freeze Time: 4–6 hours (plus churning) Servings: 6 | Equipment: Ice cream maker, saucepan, mixing bowls
The combination of sweet, slightly tart cherries with smooth vanilla custard is a classic summer flavour, made significantly better when the cherries are fresh and properly prepared at home.
Ingredients:
2 cups heavy cream
1 cup whole milk
¾ cup granulated sugar, divided
4 egg yolks
1½ tsp vanilla extract
2 cups fresh cherries, pitted and roughly chopped
1 tbsp lemon juice
Instructions:
Combine the chopped cherries with 2 tbsp sugar and the lemon juice in a small saucepan. Simmer over low heat for 8–10 minutes until softened and syrupy. Cool completely and refrigerate.
Heat the cream and milk in a separate saucepan until just steaming.
Whisk the egg yolks with the remaining sugar until pale, then temper with the hot cream mixture, whisking constantly.
Return to the saucepan and cook gently until thickened enough to coat a spoon.
Strain, stir in vanilla, and chill the custard completely.
Churn in your ice cream maker, adding the cooled cherry mixture during the last 5 minutes of churning to create ribbons throughout the ice cream.
Freeze for at least 4 hours before serving.
Expert Tips: Fresh cherries produce a significantly better flavour than canned, but frozen cherries work well as a substitute when fresh aren't in season. Don't blend the cherry mixture completely smooth — the texture of small cherry pieces is part of the appeal.
Storage: Keeps in an airtight container in the freezer for up to 3 weeks.
Variations: Add ½ cup chopped dark chocolate for cherry-chocolate-chip, or use almond extract instead of vanilla for a cherry-almond flavour profile (a classic pairing).
Shop This Recipe:
You'll also love: 10 Summer Hairstyles for Black Women That Beat the Heat
11. Lemon Blueberry Ice Cream 🍋

Prep Time: 20 minutes | Freeze Time: 4–6 hours Servings: 6 | Equipment: Mixing bowls, hand mixer, saucepan (no ice cream maker required)
A bright, tangy, refreshing flavour combination that captures everything good about summer fruit, made as a no-churn recipe for maximum simplicity.
Ingredients:
2 cups heavy cream
1 can (14 oz) sweetened condensed milk
Zest and juice of 2 lemons
1 cup fresh blueberries
2 tbsp sugar
1 tsp lemon juice (for the blueberry compote)
Instructions:
Combine the blueberries, sugar, and 1 tsp lemon juice in a small saucepan. Simmer over low heat for 8 minutes until the berries have broken down into a thick, jammy compote. Cool completely.
Whip the heavy cream with a hand mixer until stiff peaks form.
In a separate bowl, whisk the condensed milk with the lemon zest and juice.
Gently fold the whipped cream into the condensed milk mixture until fully combined and smooth.
Pour half the mixture into a freezer-safe container, swirl through half the blueberry compote, then add the remaining ice cream mixture and swirl through the rest of the compote.
Freeze for at least 4–6 hours until firm.
Expert Tips: Fold the whipped cream gently rather than stirring vigorously, to preserve as much air as possible — this is what gives no-churn ice cream its soft texture without an ice cream maker.
Storage: Keeps in an airtight container in the freezer for up to 2 weeks.
Variations: Substitute raspberries or blackberries for blueberries, or add crushed shortbread biscuits for a lemon-blueberry-cheesecake-inspired texture.
Shop This Recipe:
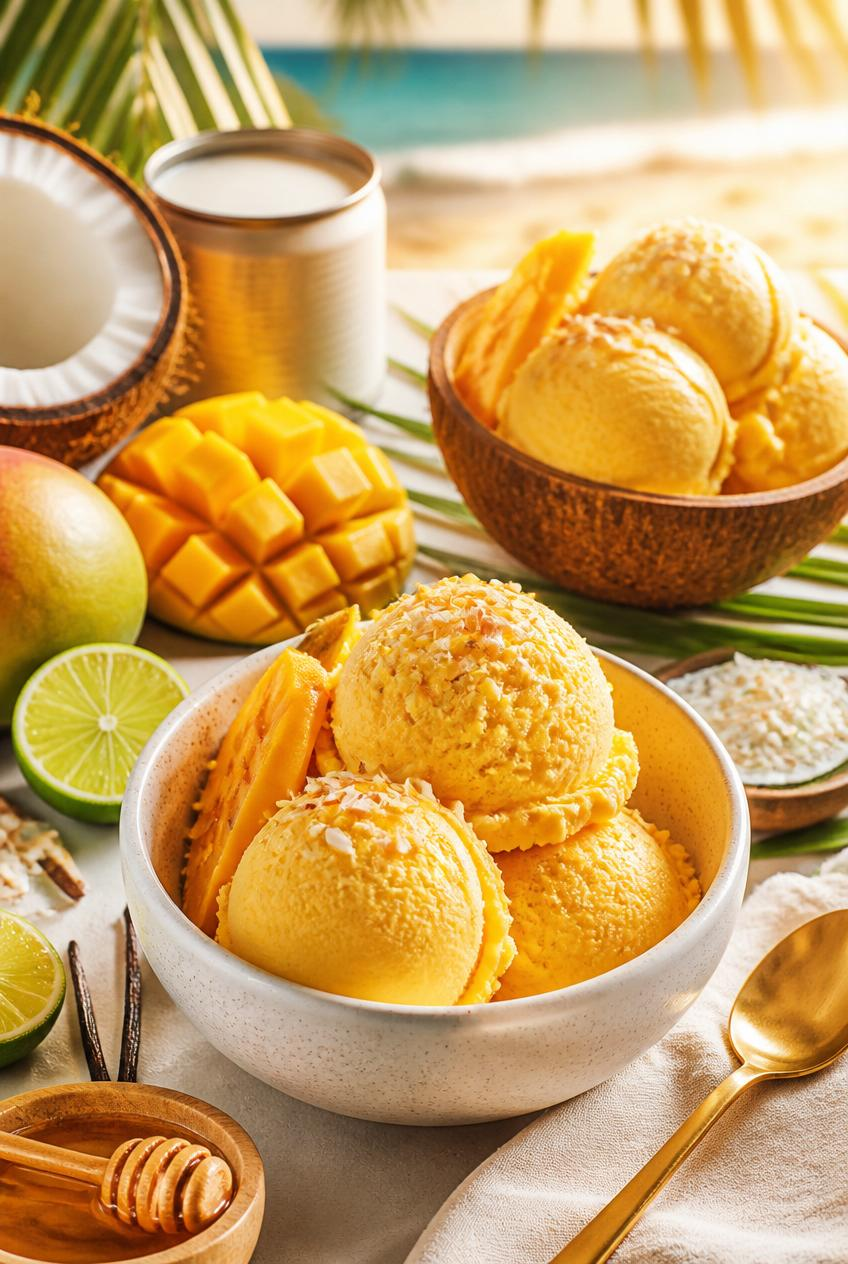
10. Mango Coconut Ice Cream 🥭
Keywords: mango coconut ice cream recipe, dairy free mango ice cream, tropical ice cream summer, mango ice cream no churn, coconut milk ice cream recipe, easy tropical dessert summer, vegan mango ice cream, summer fruit ice cream recipe
Prep Time: 15 minutes | Freeze Time: 4–6 hours (plus churning if using machine) Servings: 6 |
Equipment: Blender, ice cream maker (optional)
A tropical, naturally dairy-free flavour combination that transports you straight to a beach holiday, made with full-fat coconut milk for genuine creaminess without any dairy.
Ingredients:
2 cans (13.5 oz each) full-fat coconut milk
3 ripe mangoes, peeled and chopped (about 3 cups)
½ cup sugar or honey
1 tbsp lime juice
½ tsp vanilla extract
Pinch of salt
Instructions:
Blend the chopped mango with the lime juice until completely smooth.
In a separate bowl, whisk the coconut milk, sugar, vanilla, and salt together until the sugar dissolves.
Combine the mango purée with the coconut milk mixture and whisk until fully incorporated.
If using an ice cream maker, churn according to manufacturer instructions, then freeze for 4 hours.
If making no-churn, pour into a freezer-safe container and freeze, stirring vigorously with a fork every 45 minutes for the first 3 hours to break up ice crystals, then freeze undisturbed for another 2–3 hours.
Expert Tips: Use very ripe, sweet mangoes for the best natural flavour — the riper the mango, the less added sugar you'll need. Full-fat coconut milk is essential; light coconut milk produces an icy rather than creamy texture.
Storage: Keeps in an airtight container in the freezer for up to 3 weeks.
Variations: Add ¼ cup toasted shredded coconut for texture, or swirl in passionfruit pulp for an extra tropical dimension.
Shop This Recipe:
🎙️ Stream That Love Podcast — new episodes every week: thatlovepodcast.com/episodes
9. Raspberry Cheesecake Ice Cream 🍓

Prep Time: 25 minutes | Freeze Time: 4–6 hours Servings: 8 | Equipment: Mixing bowls, hand mixer, saucepan
This recipe combines two beloved desserts into one — creamy cheesecake-flavoured ice cream swirled with fresh raspberry sauce and crushed graham crackers for genuine textural contrast.
Ingredients:
8 oz cream cheese, softened
2 cups heavy cream
1 can (14 oz) sweetened condensed milk
1 tsp vanilla extract
1½ cups fresh or frozen raspberries
3 tbsp sugar
1 tbsp lemon juice
¾ cup crushed graham crackers
Instructions:
Combine the raspberries, sugar, and lemon juice in a small saucepan. Simmer for 8 minutes until thickened into a sauce, then cool completely and strain out the seeds if preferred.
Beat the softened cream cheese until completely smooth and lump-free.
Whisk in the condensed milk and vanilla until fully combined.
In a separate bowl, whip the heavy cream to stiff peaks, then fold gently into the cream cheese mixture.
Pour half the cheesecake mixture into a freezer-safe container, swirl through half the raspberry sauce and half the crushed graham crackers, then repeat with the remaining ingredients.
Freeze for at least 4–6 hours until firm.
Expert Tips: Make sure the cream cheese is completely softened to room temperature before beating — cold cream cheese produces lumps that are very difficult to smooth out once combined with other ingredients.
Storage: Keeps in an airtight container in the freezer for up to 2 weeks.
Variations: Use strawberries instead of raspberries, or add a swirl of melted white chocolate for an extra-decadent version.
Shop This Recipe:
You'll also love: 27 Foreplay Sex Games for Couples to Get Naughty and Horny in Minutes

8. Peanut Butter Cup Ice Cream 🥜

Prep Time: 20 minutes | Freeze Time: 4–6 hours Servings: 8 | Equipment: Mixing bowls, hand mixer
Rich, indulgent, and a guaranteed crowd-pleaser for kids and adults alike — this recipe layers creamy peanut butter ice cream with chopped peanut butter cups and a chocolate ribbon.
Ingredients:
2 cups heavy cream
1 can (14 oz) sweetened condensed milk
¾ cup smooth peanut butter
1 tsp vanilla extract
1½ cups chopped peanut butter cups (such as Reese's)
½ cup chocolate fudge sauce
Instructions:
Whip the heavy cream to stiff peaks using a hand mixer.
In a separate bowl, whisk the condensed milk, peanut butter, and vanilla together until completely smooth.
Gently fold the whipped cream into the peanut butter mixture until fully combined.
Fold in half the chopped peanut butter cups.
Pour half the mixture into a freezer-safe container, drizzle with chocolate fudge sauce, then add the remaining mixture, top with the remaining peanut butter cups, and swirl with more fudge sauce.
Freeze for at least 4–6 hours until firm.
Expert Tips: Warm the peanut butter slightly (10 seconds in the microwave) before mixing to make it easier to incorporate smoothly without overworking the whipped cream.
Storage: Keeps in an airtight container in the freezer for up to 3 weeks.
Variations: Use crunchy peanut butter for extra texture, or substitute chopped peanut butter cups with chopped peanut brittle for a different crunch profile.
Shop This Recipe:
7. Salted Caramel Ice Cream 🧂
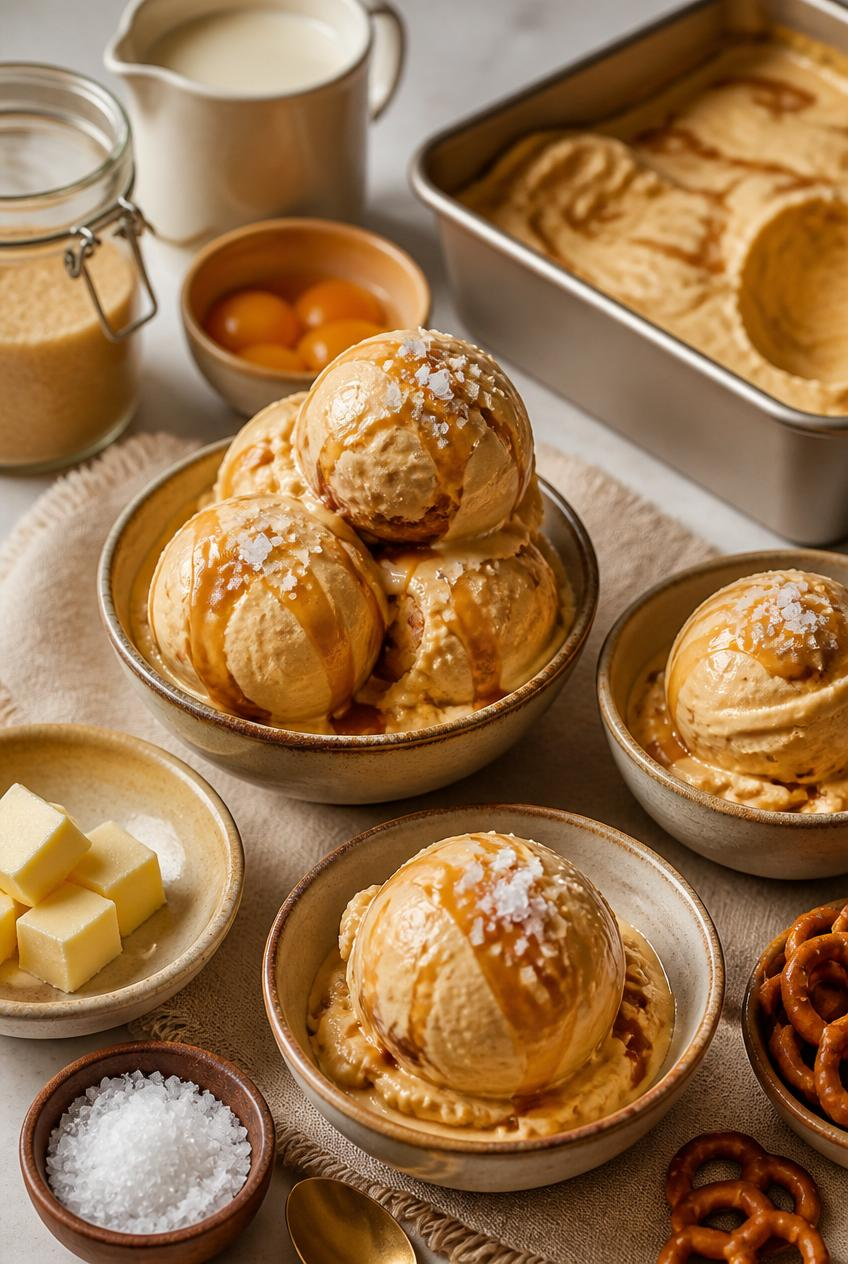
Prep Time: 30 minutes | Freeze Time: 4–6 hours (plus churning) Servings: 6 | Equipment: Ice cream maker, heavy-bottomed saucepan, mixing bowls
A genuinely gourmet flavour that tastes like it came from an artisan ice cream shop — the homemade caramel base makes all the difference compared to using store-bought caramel sauce.
Ingredients:
1 cup granulated sugar (for caramel)
6 tbsp unsalted butter, cubed
½ cup heavy cream (for caramel)
1½ tsp flaky sea salt
2 cups heavy cream (for base)
1 cup whole milk
4 egg yolks
¼ cup additional sugar
Instructions:
Make the caramel: heat 1 cup sugar in a heavy-bottomed saucepan over medium heat, stirring occasionally, until it melts into a deep amber liquid (5–8 minutes).
Remove from heat and carefully whisk in the butter, then slowly whisk in ½ cup heavy cream (it will bubble vigorously — be careful). Stir in 1 tsp sea salt. Set aside to cool.
Heat the 2 cups cream and milk in a separate saucepan until steaming.
Whisk the egg yolks with ¼ cup sugar until pale, then temper with the hot cream, whisking constantly.
Return to the saucepan and cook gently until thickened enough to coat a spoon.
Strain, whisk in half the cooled caramel, and chill the custard completely.
Churn in your ice cream maker, then transfer to a container, swirling through the remaining caramel and remaining sea salt as you layer it in.
Freeze for at least 4 hours before serving.
Expert Tips: Watch the sugar caramelisation closely — it can go from perfect amber to burnt very quickly. Use a heavy-bottomed pan to prevent scorching and don't walk away while it's cooking.
Storage: Keeps in an airtight container in the freezer for up to 3 weeks.
Variations: Add ½ cup chopped pretzels for salty-sweet crunch, or fold in chocolate chunks for salted caramel chocolate chip.
Shop This Recipe:
🎙️ Before the top six — stream That Love Podcast: thatlovepodcast.com/episodes
6. Mint Chocolate Chip Ice Cream 🌿

Prep Time: 25 minutes | Freeze Time: 4–6 hours (plus churning) Servings: 6 | Equipment: Ice cream maker, saucepan, mixing bowls
A genuinely refreshing classic that tastes significantly better with fresh mint than with artificial mint extract — this recipe steeps real mint leaves into the cream base for authentic, bright flavour.
Ingredients:
2 cups heavy cream
1 cup whole milk
¾ cup granulated sugar
1 cup fresh mint leaves, packed
4 egg yolks
½ tsp pure peppermint extract (optional, for stronger flavour)
1 cup chopped dark chocolate or mini chocolate chips
Few drops green food colouring (optional)
Instructions:
Heat the cream, milk, and sugar in a saucepan until just steaming, then remove from heat, add the fresh mint leaves, and let steep for 30 minutes.
Strain out the mint leaves, pressing to extract all the flavour, then reheat the infused cream until steaming again.
Whisk the egg yolks until pale, then temper with the hot cream mixture, whisking constantly.
Return to the saucepan and cook gently until thickened enough to coat a spoon.
Strain, stir in peppermint extract and food colouring if using, and chill completely.
Churn in your ice cream maker, adding the chopped chocolate during the last 2 minutes of churning.
Freeze for at least 4 hours before serving.
Expert Tips: Fresh mint produces a more delicate, herbaceous flavour than mint extract alone — using both together gives you the best of authentic flavour and reliable potency. Don't over-steep the mint or the flavour can become grassy and bitter.
Storage: Keeps in an airtight container in the freezer for up to 3 weeks.
Variations: Use white chocolate chips instead of dark for a sweeter contrast, or add crushed Oreo cookies alongside the chocolate chips.
Shop This Recipe:
5. Oreo Ice Cream 🍪

Prep Time: 15 minutes | Freeze Time: 4–6 hours Servings: 8 | Equipment: Mixing bowls, hand mixer
The ultimate kid-friendly crowd-pleaser — rich, creamy vanilla ice cream loaded with crushed Oreo cookies throughout, made as a simple no-churn recipe.
Ingredients:
2 cups heavy cream
1 can (14 oz) sweetened condensed milk
1 tsp vanilla extract
20 Oreo cookies, roughly crushed (reserve some for topping)
Pinch of salt
Instructions:
Whip the heavy cream with a hand mixer until stiff peaks form.
In a separate bowl, whisk the condensed milk with vanilla and salt.
Gently fold the whipped cream into the condensed milk mixture until fully combined.
Fold in the crushed Oreo cookies, reserving a handful for topping.
Pour into a freezer-safe container, top with the remaining crushed Oreos, and freeze for at least 4–6 hours until firm.
Expert Tips: Crush the Oreos roughly rather than into fine crumbs — larger pieces provide better texture and visual appeal throughout the finished ice cream. Crushing by hand in a sealed bag with a rolling pin gives better control than a food processor.
Storage: Keeps in an airtight container in the freezer for up to 3 weeks.
Variations: Use Golden Oreos for a different flavour profile, or add a chocolate fudge swirl for an extra-indulgent version.
Shop This Recipe:
You'll also love: 60 Fun Summer Date Ideas to Ignite Your Romance
4. Cookies and Cream Ice Cream 🤍

Prep Time: 20 minutes | Freeze Time: 4–6 hours (plus churning) Servings: 6 | Equipment: Ice cream maker, saucepan, mixing bowls
A genuine custard-base version of the beloved classic, producing a richer and creamier texture than most store-bought versions, with chunky cookie pieces distributed evenly throughout.
Ingredients:
2 cups heavy cream
1 cup whole milk
¾ cup granulated sugar
4 egg yolks
1 tsp vanilla extract
Pinch of salt
18 chocolate sandwich cookies, roughly chopped
Instructions:
Heat the cream and milk in a saucepan until just steaming.
Whisk the egg yolks and sugar together until pale and slightly thickened.
Temper the egg mixture with the hot cream, whisking constantly to prevent scrambling.
Return to the saucepan and cook over low heat, stirring constantly, until thickened enough to coat the back of a spoon.
Strain, stir in the vanilla and salt, and chill the custard completely (at least 4 hours, ideally overnight).
Churn in your ice cream maker, adding the chopped cookies during the final 2 minutes of churning.
Transfer to a container and freeze for at least 4 hours before serving.
Expert Tips: Add the cookies at the very end of churning, not before — adding them too early causes them to break down into mush rather than maintaining distinct chunks.
Storage: Keeps in an airtight container in the freezer for up to 3 weeks.
Variations: Use mint Oreos for a mint cookies and cream variation, or add a chocolate fudge ribbon for extra decadence.
Shop This Recipe:
3. Strawberry Ice Cream 🍓
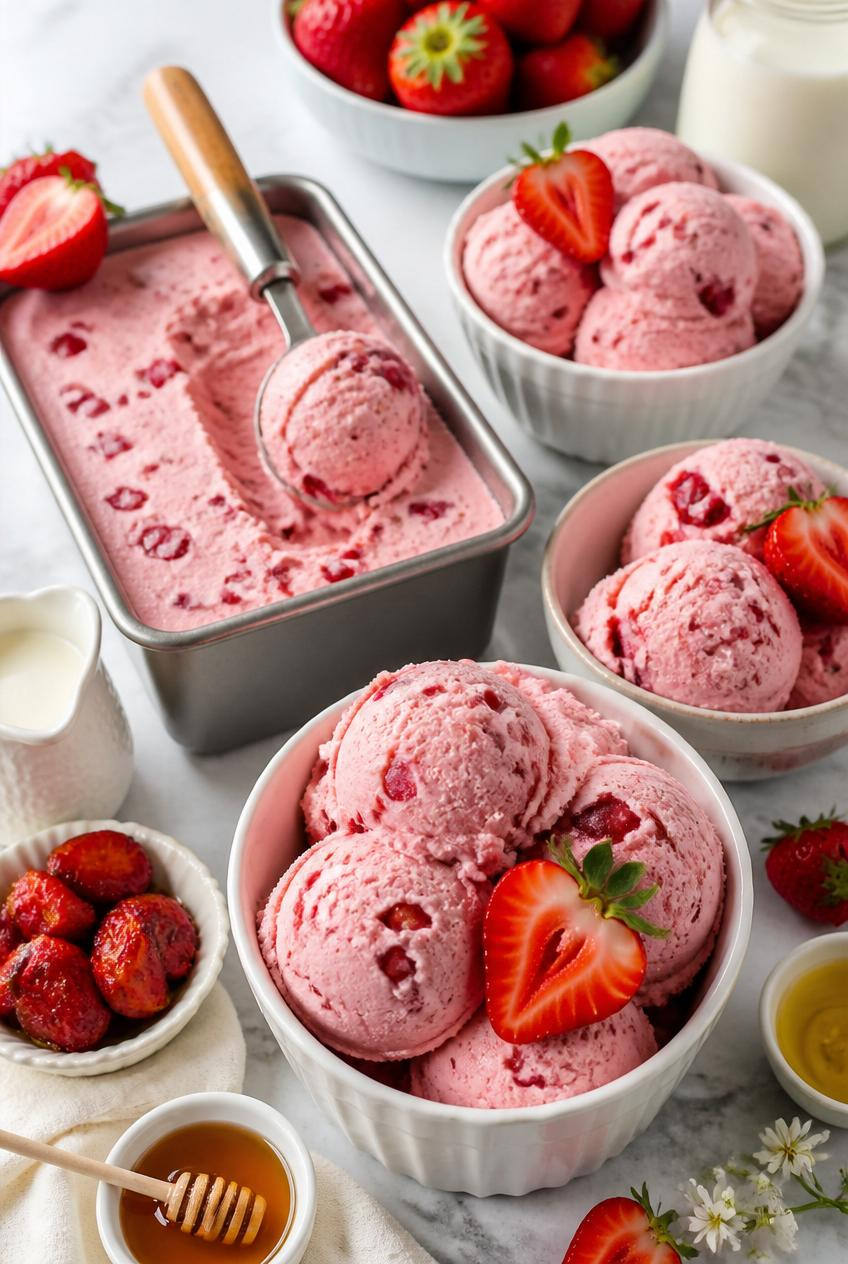
Prep Time: 25 minutes | Freeze Time: 4–6 hours (plus churning) Servings: 6 | Equipment: Ice cream maker, saucepan, blender
The quintessential summer flavour, made significantly better when fresh, ripe strawberries are roasted first to concentrate their natural sweetness and flavour.
Ingredients:
1½ lbs fresh strawberries, hulled and halved
¾ cup granulated sugar, divided
2 cups heavy cream
1 cup whole milk
4 egg yolks
1 tbsp lemon juice
1 tsp vanilla extract
Instructions:
Toss the strawberries with ¼ cup sugar and roast at 400°F (200°C) for 20 minutes until soft and juicy. Cool slightly, then blend with the lemon juice until mostly smooth (a few chunks are fine). Chill completely.
Heat the cream and milk in a saucepan until just steaming.
Whisk the egg yolks with the remaining sugar until pale, then temper with the hot cream, whisking constantly.
Return to the saucepan and cook gently until thickened enough to coat a spoon.
Strain, stir in vanilla, and chill the custard completely.
Combine the chilled custard with the strawberry purée and whisk until fully incorporated.
Churn in your ice cream maker, then transfer to a container and freeze for at least 4 hours before serving.
Expert Tips: Roasting the strawberries before blending concentrates their flavour and removes excess water, producing a more intensely flavoured ice cream that doesn't become icy.
Storage: Keeps in an airtight container in the freezer for up to 3 weeks.
Variations: Add white chocolate chunks for strawberries-and-cream, or swirl in balsamic reduction for a sophisticated adult flavour.
Shop This Recipe:
2. Chocolate Fudge Ice Cream 🍫
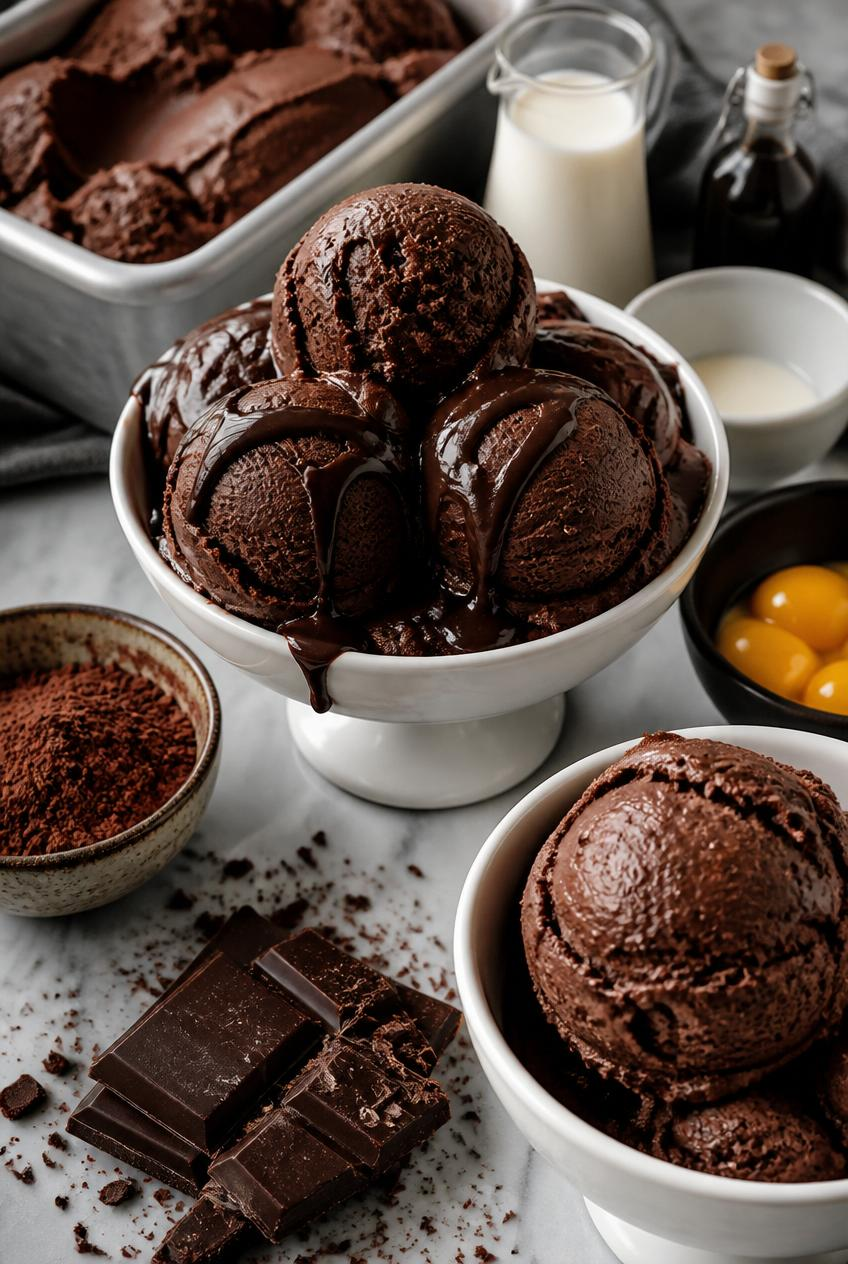
Prep Time: 25 minutes | Freeze Time: 4–6 hours (plus churning) Servings: 6 | Equipment: Ice cream maker, saucepan, mixing bowls
Deep, rich, intensely chocolatey, and genuinely decadent — this is chocolate ice cream made the way it should be, using both cocoa powder and melted dark chocolate for maximum depth of flavour.
Ingredients:
2 cups heavy cream
1 cup whole milk
¾ cup granulated sugar
½ cup unsweetened cocoa powder
4 oz dark chocolate, chopped
4 egg yolks
1 tsp vanilla extract
Pinch of salt
Instructions:
Heat the cream, milk, sugar, and cocoa powder together in a saucepan, whisking until the cocoa is fully dissolved and the mixture is steaming.
Remove from heat and stir in the chopped dark chocolate until completely melted and smooth.
Whisk the egg yolks separately until pale, then temper with the hot chocolate cream mixture, whisking constantly.
Return to the saucepan and cook gently until thickened enough to coat a spoon.
Strain, stir in vanilla and salt, and chill the custard completely (at least 4 hours, ideally overnight).
Churn in your ice cream maker according to manufacturer instructions.
Transfer to a container and freeze for at least 4 hours before serving.
Expert Tips: Use good quality dark chocolate (at least 60% cocoa) for the richest flavour. The combination of cocoa powder and melted chocolate produces a more complex chocolate flavour than either ingredient alone.
Storage: Keeps in an airtight container in the freezer for up to 3 weeks.
Variations: Swirl in fudge sauce for extra richness, or add chopped chocolate chunks for chocolate-on-chocolate texture.
Shop This Recipe:
🎙️ Before the number one — stream That Love Podcast: thatlovepodcast.com/episodes
1. Classic Vanilla Ice Cream 🍦

Prep Time: 20 minutes | Freeze Time: 4–6 hours (plus churning) Servings: 6 | Equipment: Ice cream maker, saucepan, mixing bowls
Classic vanilla ranks first because it is the foundation of everything else — the recipe every home ice cream maker should master first, and the base from which countless variations can be built.
Ingredients:
2 cups heavy cream
1 cup whole milk
¾ cup granulated sugar
1 vanilla bean, split and scraped (or 2 tsp pure vanilla extract)
5 egg yolks
Pinch of salt
Instructions:
Heat the cream, milk, and vanilla bean seeds and pod in a saucepan over medium heat until just steaming. Remove from heat, cover, and let steep for 20 minutes to infuse the vanilla flavour. Remove the vanilla pod.
Whisk the egg yolks and sugar together until pale and slightly thickened.
Reheat the cream mixture until steaming again, then slowly pour into the egg yolks while whisking constantly, to temper without scrambling.
Return the mixture to the saucepan and cook over low heat, stirring constantly with a wooden spoon, until thickened enough to coat the back of the spoon (run your finger through it — if the line holds, it's ready).
Strain through a fine sieve into a clean bowl, stir in the salt (and vanilla extract if using instead of a vanilla bean), then chill completely in the fridge — at least 4 hours, ideally overnight.
Churn in your ice cream maker according to manufacturer instructions, until thick and soft-serve consistency.
Transfer to a container and freeze for at least 4 hours before serving for a firmer, scoopable texture.
Expert Tips: A real vanilla bean produces a noticeably superior flavour to extract alone, with visible vanilla seeds throughout the finished ice cream — worth the slightly higher cost for special occasions. Never let the custard boil while cooking; this will scramble the eggs. Cook low and slow, stirring constantly.
Storage: Keeps in an airtight container in the freezer for up to 4 weeks — vanilla is one of the longest-lasting homemade ice cream flavours due to its simple ingredient base.
Variations: This recipe is the base for almost every other flavour on this list — add mix-ins during the final minutes of churning, swirl in sauces after churning, or steep alternative flavourings (lavender, cinnamon, citrus zest) into the cream in place of vanilla.
Shop This Recipe:
Conclusion
Homemade ice cream is one of summer's most genuinely rewarding kitchen projects — simple enough for a relaxed weekend afternoon, impressive enough to be the highlight of any gathering, and infinitely more flavourful than anything from a supermarket freezer aisle.
From the foundational perfection of classic vanilla to the tropical escape of mango coconut, from the indulgent richness of chocolate fudge to the no-churn simplicity of banana ice cream, this list gives you fourteen genuinely excellent reasons to dust off your ice cream maker — or simply reach for a whisk and a freezer.
Master the classic vanilla custard base first. Everything else on this list becomes significantly easier once you understand it.

Now go make something cold, creamy, and entirely your own.
💛 Support That Love Podcast: Donate here
🎙️ Stream That Love Podcast now: thatlovepodcast.com/episodes
💡 You May Also Love
10 Frequently Asked Questions
1. Do I need an ice cream maker to make homemade ice cream? No — several recipes on this list (Banana Ice Cream, Lemon Blueberry, Raspberry Cheesecake, Peanut Butter Cup, Oreo) are no-churn recipes that require only a freezer, a mixing bowl, and a hand mixer. Custard-based recipes (Vanilla, Chocolate Fudge, Coffee, Strawberry, Mint Chocolate Chip, Cherry Vanilla, Cookies and Cream, Salted Caramel) benefit from an ice cream maker for the smoothest texture, but can be made without one by whisking the mixture vigorously every 30–45 minutes during freezing to break up ice crystals.
2. Why is my homemade ice cream icy instead of creamy? Iciness usually results from insufficient fat content, too much water content (from fruit purées that haven't been concentrated), or freezing without enough air incorporation. Using full-fat cream, roasting or reducing fruit before adding it, and either churning properly or whisking vigorously during freezing (for no-churn methods) all help produce a creamier texture.
3. How long does homemade ice cream last in the freezer? Most homemade ice cream recipes keep well for 2–4 weeks in an airtight container in the freezer. Simpler recipes with fewer mix-ins (like classic vanilla) tend to last longer than recipes with fresh fruit or dairy-based swirls, which can develop ice crystals more quickly.
4. What's the difference between custard-based and no-churn ice cream? Custard-based ice cream uses egg yolks cooked into a custard base, producing a richer, smoother, more traditional ice cream texture, but requires an ice cream maker and more preparation time. No-churn ice cream uses whipped cream folded with sweetened condensed milk to achieve a similar creamy texture without eggs, cooking, or special equipment, making it significantly faster and more beginner-friendly.
5. Can I make these ice cream recipes dairy-free? Yes — several recipes adapt well to dairy-free substitutions. The Mango Coconut recipe is naturally dairy-free using coconut milk. For other recipes, substitute full-fat coconut milk or cashew cream for heavy cream and milk, though the texture and flavour will differ somewhat from the dairy versions.
6. What is the best ice cream maker for beginners? Compressor-style ice cream makers (which don't require pre-freezing a bowl) offer the most convenience for frequent ice cream making, though they are more expensive. Bowl-freezer style machines (where you freeze a bowl in advance and then churn) are more affordable and work well for occasional use, provided the bowl is frozen solid for at least 24 hours before use.
7. Why do I need to chill the custard before churning? Chilling the custard base completely (ideally overnight) before churning allows the mixture to thicken properly and ensures it churns into ice cream faster and with a smoother texture. Churning a warm or even room-temperature custard produces icier, less creamy results.
8. Can I reduce the sugar in these recipes? Yes, to some extent — most recipes can have sugar reduced by up to 25% without significantly affecting texture, though sugar does play a structural role in preventing ice cream from freezing too hard, so reducing it too much can result in a harder, less scoopable texture. Honey or maple syrup can be substituted in many no-churn recipes as natural sweeteners.
9. What's the best way to soften ice cream for scooping? Let homemade ice cream sit at room temperature for 5–10 minutes before scooping if it has been in the freezer for several hours and become very firm. Homemade ice cream typically freezes harder than commercial ice cream because it lacks the stabilisers used in mass production.
10. Can I make these recipes in advance for a party? Yes — all the recipes on this list can be made several days to a few weeks in advance and stored in airtight containers in the freezer. For the best texture and flavour at a gathering, make the ice cream no more than 1–2 weeks before serving, and transfer to the fridge for 15–20 minutes before serving to soften slightly for easier scooping.
For more summer recipe inspiration: 10 Easy Plants That Thrive in Summer Heat


.jpg)


.jpg)







Comments