14 Pumpkin-Inspired Nail Designs for October
- Joao Nsita
- Sep 4, 2025
- 13 min read


It’s that time of year again. The leaves are changing, the air is crisp, and everything is coming up pumpkins. From pumpkin spice lattes to pumpkin patches, the world is obsessed with this festive gourd. And what better way to show your love for all things pumpkin than with a festive manicure?
Pumpkin-inspired nail designs are a great way to get into the Halloween spirit. They can be as simple or as elaborate as you want them to be, and there are endless possibilities to choose from. Whether you’re a fan of classic orange and black or you prefer something a little more unique, there’s a pumpkin nail design out there for you.
In this article, we’ll show you 14 of the best pumpkin-inspired nail designs for October. We’ve got something for everyone, from simple and chic to bold and over-the-top. So get ready to be inspired and get your nails ready for Halloween!

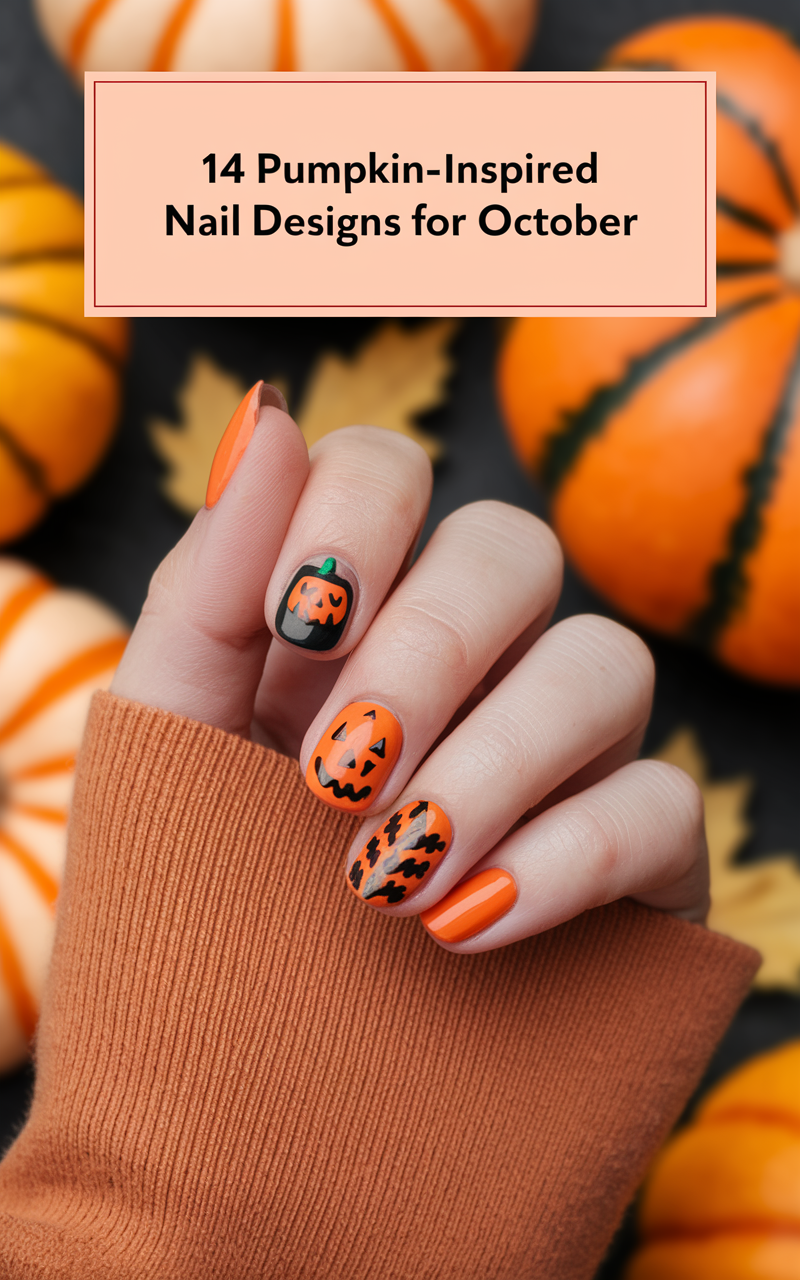
1. The Classic Jack-O'-Lantern
You can’t go wrong with a classic jack-o'-lantern design. This timeless look is perfect for Halloween and is sure to get you in the spooky spirit. To create this design, you’ll need orange and black nail polish. First, paint your nails with two coats of orange polish. Once the orange polish is dry, use a thin brush to paint on the jack-o'-lantern’s face. You can make your jack-o'-lantern as scary or as friendly as you want.
For a classic look, stick with a simple triangle nose and a jagged smile. If you’re feeling more creative, you can try a more elaborate design. Once you’re happy with your jack-o'-lantern’s face, seal the design with a top coat. This will help to protect your manicure and make it last longer.
If you’re not confident in your freehand painting skills, you can use a stencil to create the jack-o'-lantern’s face. You can find jack-o'-lantern stencils at most beauty supply stores or online. Simply place the stencil on your nail and paint over it with black polish. Once the polish is dry, carefully remove the stencil to reveal your perfect jack-o'-lantern design. For more on spooky-themed looks, check out The Love of Horror: Why We’re Drawn to the Macabre.

2. The Glitter Pumpkin
If you’re looking for a pumpkin nail design with a little more pizzazz, then the glitter pumpkin is the perfect choice for you. This design is perfect for a night out on the town or a Halloween party. To create this look, you’ll need orange glitter nail polish and black nail polish.
First, paint your nails with two coats of orange glitter polish. Once the glitter polish is dry, use a thin brush to paint on the jack-o'-lantern’s face. You can make your jack-o'-lantern as spooky or as cute as you want. For a more glamorous look, you can add a few rhinestones to the design. Once you’re happy with your glitter pumpkin, seal the design with a top coat.
This will help to protect your manicure and make it last longer. You can also use a glitter top coat to add even more sparkle to your design. For a truly unique look, you can try using different colors of glitter polish. For example, you could use black glitter polish for the jack-o'-lantern’s face or green glitter polish for the stem. The possibilities are endless!

3. The Polka Dot Pumpkin
The polka dot pumpkin is a fun and festive design that is perfect for any occasion. This design is easy to create and can be customized to match any outfit. To create this look, you’ll need orange nail polish, white nail polish, and a dotting tool.
First, paint your nails with two coats of orange polish. Once the orange polish is dry, use the dotting tool to create white polka dots on your nails. You can make the polka dots as big or as small as you want. For a more uniform look, you can use a stencil to create the polka dots. Once you’re happy with your polka dot pumpkin, seal the design with a top coat.
This will help to protect your manicure and make it last longer. You can also use a different color of polish for the polka dots. For example, you could use black polish for a more traditional Halloween look or pink polish for a more feminine look. The possibilities are endless! For more fun and creative ideas, check out The Art of Play: Rekindling Joy and Creativity in Adulthood.

4. The Striped Pumpkin
The striped pumpkin is a chic and sophisticated design that is perfect for the office or a night out. This design is easy to create and can be customized to match any outfit. To create this look, you’ll need orange nail polish, black nail polish, and striping tape.
First, paint your nails with two coats of orange polish. Once the orange polish is dry, use the striping tape to create stripes on your nails. You can make the stripes as thick or as thin as you want. For a more uniform look, you can use a stencil to create the stripes. Once you’re happy with your striped pumpkin, seal the design with a top coat.
This will help to protect your manicure and make it last longer. You can also use a different color of polish for the stripes. For example, you could use white polish for a more classic look or gold polish for a more glamorous look. The possibilities are endless!

5. The French Manicure Pumpkin
The French manicure pumpkin is a subtle and elegant design that is perfect for any occasion. This design is a fun twist on the classic French manicure and is sure to get you in the Halloween spirit. To create this look, you’ll need a sheer pink or nude nail polish, orange nail polish, and a thin brush.
First, paint your nails with two coats of the sheer pink or nude polish. Once the polish is dry, use the thin brush to paint a thin orange line across the tips of your nails. You can make the line as thick or as thin as you want. For a more uniform look, you can use a stencil to create the line. Once you’re happy with your French manicure pumpkin, seal the design with a top coat.
This will help to protect your manicure and make it last longer. You can also use a different color of polish for the tips of your nails. For example, you could use black polish for a more traditional Halloween look or white polish for a more classic look. You can get more ideas for a French manicure pumpkin on Pinterest.

6. The Half-Moon Pumpkin
The half-moon pumpkin is a trendy and modern design that is perfect for any fashionista. This design is a fun twist on the classic half-moon manicure and is sure to get you in the Halloween spirit. To create this look, you’ll need orange nail polish, a sheer pink or nude nail polish, and reinforcement stickers.
First, paint your nails with two coats of the sheer pink or nude polish. Once the polish is dry, place a reinforcement sticker at the base of your nail, leaving a small sliver of your natural nail exposed. Then, paint the rest of your nail with two coats of orange polish. Once the orange polish is dry, carefully remove the reinforcement sticker to reveal your perfect half-moon pumpkin design.
Seal the design with a top coat to protect your manicure and make it last longer. You can also use a different color of polish for the half-moon. For example, you could use black polish for a more traditional Halloween look or white polish for a more classic look. The possibilities are endless!

7. The Ombré Pumpkin
The ombré pumpkin is a beautiful and eye-catching design that is perfect for any occasion. This design is a fun twist on the classic ombré manicure and is sure to get you in the Halloween spirit. To create this look, you’ll need orange nail polish, yellow nail polish, and a makeup sponge.
First, paint your nails with two coats of yellow polish. Once the yellow polish is dry, apply a strip of orange polish and a strip of yellow polish to the makeup sponge. Then, dab the sponge onto your nails to create the ombré effect. You may need to repeat this step a few times to achieve the desired look. Once you’re happy with your ombré pumpkin, seal the design with a top coat.
This will help to protect your manicure and make it last longer. You can also use different colors of polish for the ombré effect. For example, you could use black and orange polish for a more traditional Halloween look or pink and orange polish for a more feminine look. For more on color and its effect on us, see The Psychology of Color: How Hues Influence Our Emotions and Decisions.

8. The Watercolor Pumpkin
The watercolor pumpkin is a delicate and ethereal design that is perfect for any romantic. This design is a fun twist on the classic watercolor manicure and is sure to get you in the Halloween spirit. To create this look, you’ll need a white nail polish, orange nail polish, and a small paintbrush.
First, paint your nails with two coats of white polish. Once the white polish is dry, use the small paintbrush to create a watercolor effect with the orange polish. To do this, simply dip the paintbrush in the orange polish and then dab it onto your nails. You can make the watercolor effect as subtle or as dramatic as you want. Once you’re happy with your watercolor pumpkin, seal the design with a top coat.
This will help to protect your manicure and make it last longer. You can also use different colors of polish for the watercolor effect. For example, you could use black and orange polish for a more traditional Halloween look or pink and orange polish for a more feminine look. For more on expressing yourself, check out The Power of Authenticity: Embracing Your True Self in a World of Expectations.
9. The 3D Pumpkin
For a truly show-stopping pumpkin nail design, you have to try the 3D pumpkin. This design is not for the faint of heart, but it is sure to get you noticed. To create this look, you’ll need orange acrylic powder, a small brush, and a top coat.
First, you’ll need to create the 3D pumpkins. To do this, mix the orange acrylic powder with a monomer to create a small bead of acrylic. Then, use the small brush to shape the bead into a pumpkin. You can make your pumpkins as big or as small as you want. Once you’re happy with your pumpkins, let them dry completely.
Once the pumpkins are dry, you can attach them to your nails. To do this, simply apply a small amount of nail glue to the back of the pumpkin and then press it onto your nail. Hold the pumpkin in place for a few seconds to make sure it is secure. Once all of the pumpkins are attached, seal the design with a top coat. For a tutorial on how to make 3D pumpkins, you can check out this TikTok video.

10. The Matte Pumpkin
If you’re not a fan of glossy nails, then the matte pumpkin is the perfect design for you. This chic and sophisticated look is perfect for the office or a night out. To create this look, you’ll need orange nail polish and a matte top coat.
First, paint your nails with two coats of orange polish. Once the orange polish is dry, apply a matte top coat to your nails. This will give your nails a chic and sophisticated matte finish. You can also use a different color of polish for the pumpkin. For example, you could use black polish for a more traditional Halloween look or white polish for a more classic look.
You can also add a few embellishments to your matte pumpkin design. For example, you could add a few rhinestones or studs to the design. This will give your nails a little bit of extra sparkle and shine. For more on how to elevate your style, read The Art of Seduction: More Than Just Romance.

11. The Jeweled Pumpkin
For a truly glamorous pumpkin nail design, you have to try the jeweled pumpkin. This design is perfect for a special occasion or a night out on the town. To create this look, you’ll need orange nail polish, a variety of rhinestones and studs, and a top coat.
First, paint your nails with two coats of orange polish. Once the orange polish is dry, you can start to add the rhinestones and studs to your nails. You can create any design you want with the rhinestones and studs. For a more uniform look, you can use a stencil to create the design. Once you’re happy with your jeweled pumpkin, seal the design with a top coat.
This will help to protect your manicure and make it last longer. You can also use a different color of polish for the pumpkin. For example, you could use black polish for a more traditional Halloween look or white polish for a more classic look. The possibilities are endless! For more glamour, check out this article.

12. The Negative Space Pumpkin
The negative space pumpkin is a trendy and modern design that is perfect for any fashionista. This design is a fun twist on the classic negative space manicure and is sure to get you in the Halloween spirit. To create this look, you’ll need a clear nail polish, orange nail polish, and a thin brush.
First, paint your nails with a clear top coat. Once the top coat is dry, use the thin brush to paint a pumpkin on your nail. You can make the pumpkin as big or as small as you want. For a more uniform look, you can use a stencil to create the pumpkin. Once you’re happy with your negative space pumpkin, seal the design with a top coat.
This will help to protect your manicure and make it last longer. You can also use a different color of polish for the pumpkin. For example, you could use black polish for a more traditional Halloween look or white polish for a more classic look. For more on finding beauty in unexpected places, see The Beauty of Imperfection: Finding Love in Wabi-Sabi.

13. The Stamped Pumpkin
If you’re not confident in your freehand painting skills, then the stamped pumpkin is the perfect design for you. This design is easy to create and is sure to get you in the Halloween spirit. To create this look, you’ll need a stamping plate with a pumpkin design, a stamper, a scraper, and orange and black nail polish.
First, paint your nails with two coats of orange polish. Once the orange polish is dry, apply a small amount of black polish to the pumpkin design on the stamping plate. Then, use the scraper to remove the excess polish from the plate. Next, press the stamper onto the plate to pick up the design. Finally, press the stamper onto your nail to transfer the design.
Once you’re happy with your stamped pumpkin, seal the design with a top coat. This will help to protect your manicure and make it last longer. You can also use a different color of polish for the pumpkin. For example, you could use white polish for a more classic look or gold polish for a more glamorous look. You can find stamping plates with a variety of pumpkin designs at most beauty supply stores or online. For more on this, check out Cosmopolitan's guide to autumn nails. For a deeper dive into self-expression, listen to The Language of a Gaze: What Eyes Reveal About Love and Desire.

14. The Abstract Pumpkin
For a truly unique and artistic pumpkin nail design, you have to try the abstract pumpkin. This design is perfect for any creative soul and is sure to get you noticed. To create this look, you’ll need a variety of nail polish colors, a thin brush, and a top coat.
First, you’ll need to create the abstract pumpkins. To do this, simply use the thin brush to paint a variety of shapes and lines on your nails. You can use any colors you want to create your abstract pumpkins. For a more cohesive look, you can stick to a color palette of oranges, yellows, and browns.
Once you’re happy with your abstract pumpkins, let them dry completely. Then, seal the design with a top coat. This will help to protect your manicure and make it last longer. You can also add a few embellishments to your abstract pumpkin design. For example, you could add a few rhinestones or studs to the design. This will give your nails a little bit of extra sparkle and shine. For more on the art of communication, see The Art of Conversation: Keeping Love Alive and Thriving.
Conclusion
As you can see, there are endless possibilities when it comes to pumpkin-inspired nail designs. Whether you’re looking for something simple and chic or bold and over-the-top, there’s a pumpkin nail design out there for you. So get creative and have fun with it!
And don’t forget to check out our other articles on our blog for more fun and festive ideas. From recipes to DIY projects, we’ve got everything you need to make this Halloween the best one yet. For more on the power of relationships, check out The Power of Friendship: How Platonic Bonds Shape Our Lives.

FAQs
1. How long do pumpkin nail designs last?
With proper care, your pumpkin nail design can last for up to two weeks. To make your manicure last longer, be sure to use a top coat and avoid using your nails as tools.
2. Can I do pumpkin nail designs on short nails?
Yes, you can do pumpkin nail designs on short nails. In fact, some designs, like the French manicure pumpkin, look even better on short nails.
3. What are some other popular Halloween nail designs?
Some other popular Halloween nail designs include ghosts, bats, spiders, and spiderwebs. You can also get creative and come up with your own unique designs.
4. Where can I find more inspiration for Halloween nail designs?
5. What are some good nail polish brands for Halloween nail designs?
Some good nail polish brands for Halloween nail designs include OPI, Essie, and China Glaze. These brands offer a wide variety of colors and finishes to choose from.
6. How can I make my pumpkin nail design look more professional?
To make your pumpkin nail design look more professional, be sure to use a good quality nail polish and top coat. You should also take your time and be patient when creating your design.
7. How can I remove my pumpkin nail design?
To remove your pumpkin nail design, simply soak a cotton ball in nail polish remover and rub it on your nails. The polish should come off easily.
8. Can I get a pumpkin nail design at a salon?
Yes, you can get a pumpkin nail design at a salon. In fact, many salons offer special Halloween-themed nail designs during the month of October.
9. How much does it cost to get a pumpkin nail design at a salon?
The cost of a pumpkin nail design at a salon will vary depending on the salon and the complexity of the design. However, you can expect to pay anywhere from $30 to $60 for a pumpkin nail design. For more on love and relationships, see The Science of Love: From Attraction to Long-Term Commitment.
10. What are some good resources for learning how to do pumpkin nail designs?


.jpg)


.jpg)

Comments